This blog post will guide you through the process of install Swift for Tensorflow on Ubuntu 18.04 (Local Machine/VM instance) and Start Coding with Swift on the Jupyter Notebook like you do in Python for Tensorflow.
Step 01: Installing CUDA
There are several versions of Swift-TF available to install as you prefer. Namely (on 30th March 2019), CPU only version, CUDA 9.2 version and CUDA 10.0 version. This section is only focused on CUDA installation. You can skip to the next step if you prefer CPU only installation.
If you have been working on Tensorflow or PyTorch, CUDA might be installed on your ubuntu machine. You can check the installed CUDA version using the below command
(base) vkartz@ubuntu-dl:~$ nvcc --version
nvcc: NVIDIA (R) Cuda compiler driver
Copyright (c) 2005-2018 NVIDIA Corporation
Built on Sat_Aug_25_21:08:01_CDT_2018
Cuda compilation tools, release 10.0, V10.0.130
In my case, CUDA v10.0 is installed on my machine
If you have v9.2 or v10.0 installed, You can go to the next step 😃
But sometimes you might get a response like below after executing the above command,
(base) vkartz@ubuntu-dl:~$ nvcc --version
Command 'nvcc' not found, but can be installed with:
apt install nvidia-cuda-toolkit
Please ask your administrator.
- This error has two possibilities:
- Your machine have CUDA installed but the Environment variable is not set.
- Your machine do not have CUDA installed.
If Case #1 (Env variable is not set) :
Use the below command to locate your cuda installation on your machine
(base) vkartz@ubuntu-dl:~$ locate cuda | grep /cuda$
/home/vkartz/anaconda3/pkgs/pytorch-1.0.1-py3.7_cuda10.0.130_cudnn7.4.2_2/lib/python3.7/site-packages/
torch/lib/include/ATen/cuda
/home/vkartz/anaconda3/pkgs/pytorch-1.0.1-py3.7_cuda10.0.130_cudnn7.4.2_2/lib/python3.7/site-packages/
torch/lib/include/c10/cuda
/home/vkartz/anaconda3/pkgs/pytorch-1.0.1-py3.7_cuda10.0.130_cudnn7.4.2_2/lib/python3.7/site-packages/
torch/lib/include/torch/csrc/cuda
/usr/local/cuda
/usr/local/cuda-10.0/targets/x86_64-linux/include/thrust/system/cuda
/usr/local/cuda is the installation location of my machine.
After you finding the installed location of CUDA, Then Go to [location]/bin and run the below command
(base) vkartz@ubuntu-dl:~$ cd /usr/local/cuda/bin/
(base) vkartz@ubuntu-dl:/usr/local/cuda/bin$ ./nvcc --version
nvcc: NVIDIA (R) Cuda compiler driver
Copyright (c) 2005-2018 NVIDIA Corporation
Built on Sat_Aug_25_21:08:01_CDT_2018
Cuda compilation tools, release 10.0, V10.0.130
If this went fine, You can go to the next step 😃
If Case #2 (CUDA not installed) :
To install CUDA on your machine properly, Go to Tensorflow CUDA installation GUIDE and follow their instructions on CUDA v10.0 installation.
If this went fine, You can go to the next step 😃
Step 02: Installing Swift for Tensorflow
You can follow the *Installation Guide on docs to install but,
*According to my experience during the process, I suggest following below Modified steps which will help you in later steps and clean installation.
- Go to your home directory.
(base) vkartz@ubuntu-dl:~$
- Run below command to install required dependencies.
(base) vkartz@ubuntu-dl:~$ sudo apt-get install clang libpython-dev libblocksruntime-dev
- Visit Swift for Tensorflow Installation page on GitHub to download the latest binary release which is compatible with your CUDA version.
Downloaded file looks like
swift-tensorflow-RELEASE-0.2-cuda10.0-cudnn7-ubuntu18.04.tar - Then create a directory on your home directory called swift-toolchain and extract the downloaded file to that directory. This will create
~/swift-toolchain/usrdirectory
(base) vkartz@ubuntu-dl:~$ mkdir swift-toolchain
(base) vkartz@ubuntu-dl:~$ tar -C swift-toolchain -xzf swift-tensorflow-RELEASE-0.2-cuda10.0-cudnn7-ubuntu18.04.tar.gz
- To check whether the installation is completed. Go
~/swift-toolchain/usr/bindirectory and run./swiftREPL like below.
(base) vkartz@ubuntu-dl:~$ cd ~/swift-toolchain/usr/bin
(base) vkartz@ubuntu-dl:~/swift-toolchain/usr/bin$ ./swift
Welcome to Swift version 5.0-dev (LLVM dcb9eb74a7, Clang 95cdf7c9af, Swift 434442b530).
Type :help for assistance.
  1> print("Hello world")
Hello world
  2>
If the above steps went fine, You successfully installed swift and you can go to the next step 😃
Step 03: Installing Jupyter-Notebook for Swift
In this step, I am following Google’s swift-jupyter Installation Guide with some Modifications.
On the above guide, there are several options available to install Jupyter Notebook for Swift. But I strongly suggest installing this via Conda.
- Create a new Conda Environment for swift-tensorflow
(base) vkartz@ubuntu-dl:~$ conda create -n swift-tensorflow python==3.6
- After Environment creation is completed. Activate the swift-tensorflow environment like below. And Install required packages.
(base) vkartz@ubuntu-dl:~$ conda env list
# conda environments:
#
base                  *  /home/vkartz/anaconda3
swift-tensorflow         /home/vkartz/anaconda3/envs/swift-tensorflow
(base) vkartz@ubuntu-dl:~$ conda activate swift-tensorflow
(swift-tensorflow) vkartz@ubuntu-dl:~$
(swift-tensorflow) vkartz@ubuntu-dl:~$ conda install jupyter numpy matplotlib
- Clone the Google Swift Jupyter repository to current directory and go into the repository.
(swift-tensorflow) vkartz@ubuntu-dl:~$ git clone https://github.com/google/swift-jupyter.git
(swift-tensorflow) vkartz@ubuntu-dl:~$ cd swift-jupyter
(swift-tensorflow) vkartz@ubuntu-dl:~/swift-jupyter$ ls
CONTRIBUTING                LICENSE    parent_kernel.py  screenshots      test
EnableIPythonDisplay.swift  README.md  register.py       swift_kernel.py
KernelCommunicator.swift    docker     requirements.txt  swift_shell
(swift-tensorflow) vkartz@ubuntu-dl:~/swift-jupyter$
For the next step,
you need to find installed locations for Swift toolchain and Python installed location for current conda Environment.
- Swift toolchain location:
If you follow Step 02 correctly your Swift toolchain location should be~/swift-toolchain/ - Python Installed location for Current Conda Environment:
Run the below command on your terminal to locate the location.
(swift-tensorflow) vkartz@ubuntu-dl:~$ conda info | grep "active env location"
  active env location : /home/vkartz/anaconda3/envs/swift-tensorflow
- Then run
python register.py --sys-prefix --swift-toolchain <path swift toolchain directory> --swift-python-library <active env location>/lib/libpython3.6m.socommand to register the Swift Kernal. You need to fill<path swift toolchain directory>and<active env location>using above values. Example command as follows,
(swift-tensorflow) vkartz@ubuntu-dl:~/swift-jupyter$ python register.py --sys-prefix --swift-toolchain ~/swift-toolchain/ --swift-python-library ~/anaconda3/envs/swift-tensorflow/lib/libpython3.6m.so
The response should be like below,
kernel.json:
{
  "argv": [
    "/home/vkartz/anaconda3/envs/swift-tensorflow/bin/python",
    "/home/vkartz/swift-jupyter/parent_kernel.py",
    "-f",
    "{connection_file}"
  ],
  "display_name": "Swift",
  "language": "swift",
  "env": {
    "PYTHONPATH": "/home/vkartz/swift-toolchain/usr/lib/python3.6/site-packages",
    "LD_LIBRARY_PATH": "/home/vkartz/swift-toolchain/usr/lib/swift/linux",
    "REPL_SWIFT_PATH": "/home/vkartz/swift-toolchain/usr/bin/repl_swift",
    "SWIFT_BUILD_PATH": "/home/vkartz/swift-toolchain/usr/bin/swift-build",
    "PYTHON_LIBRARY": "/home/vkartz/anaconda3/envs/swift-tensorflow/lib/libpython3.6m.so"
  }
}
Registered kernel 'Swift' as 'swift'!
(swift-tensorflow) vkartz@ubuntu-dl:~/swift-jupyter$
- Now run Jupyter Notebook from your terminal
(swift-tensorflow) vkartz@ubuntu-dl:~$ jupyter-notebook
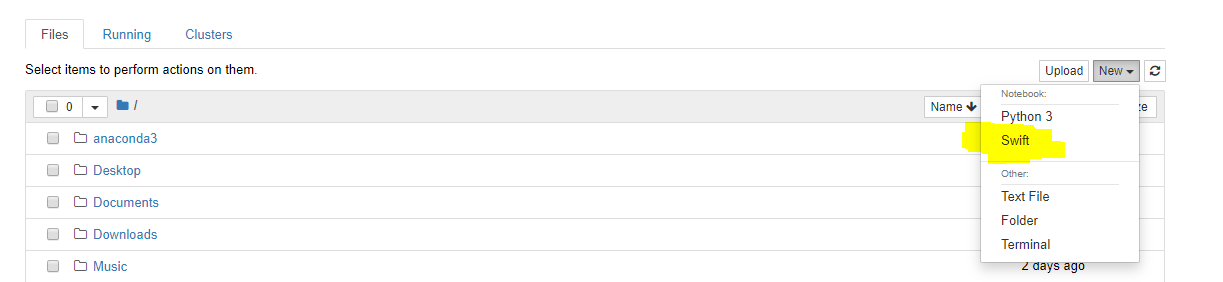
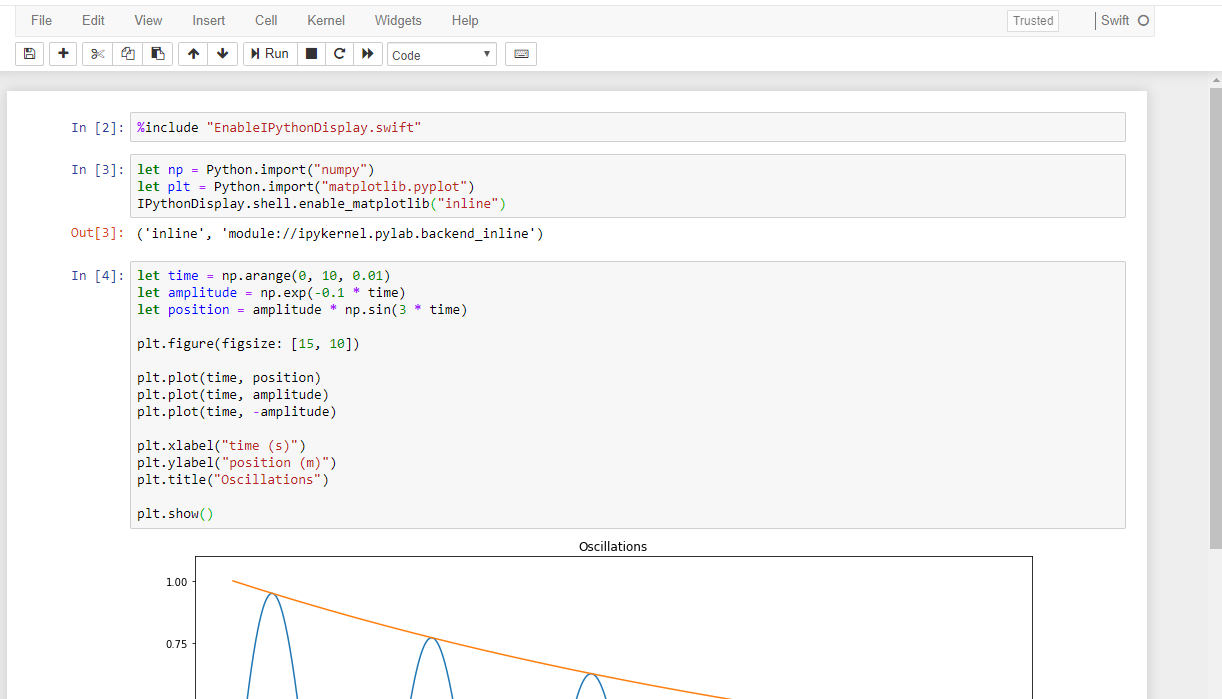
Now you can open a New Jupyter Notebook as Swift: